I personally use iTunes for my music needs on the PC. It's fairly simple and intuitive in my opinion. Until recently I used to just plunk my CD in my PC and played it. My hard drive space was limited so I was trying to conserve space. Recently after upgrading my hard drive I tried my hand at "ripping" my CD's onto my PC. I've come to favor Apple's iTunes player. Though there are others I'd just thought I'd share a little of my experience and give a very basic tutorial on this subject. I'm going to assume you've already have iTunes installed and CD's in hand. Here we go....
2. Open your CD/DVD player and insert your CD of choice. At this point you'll wait for iTunes to gather information on your CD. This shouldn't take too long.1. First of all you open your iTunes program either by click on your desktop icon or programs menu.

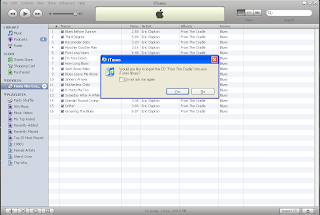
3. When iTunes is done retrieving information you'll get a pop-up asking if you'd like to import(aka: Rip) your CD onto iTunes. You wish to rip entire CD click on "Yes". If wish to select certain songs click "No" and see step 4. Now sit back let the PC do the rest. iTunes will play the music as it's importing your CD.

4. After you've clicked "No"(see step 3). Uncheck the songs you don't want from the list. Then click "Import CD" button on lower right hand corner of iTunes window. It will then "import" only the songs that are check marked.

Well there you have it. It's fairly simple. There are other settings and stuff you can get into but I just wanted to cover the basics here. I've got addicted to adding my music myself. I hope this was informative and helpful. Thanks for reading and "Long Live Rock!"
No comments:
Post a Comment